The Thrower's Page
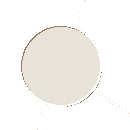
![]() EVENTS
EVENTS
Shot
Discus
Hammer
Javelin
![]() STATS
STATS
Rankings
Age
Combos
Both hands
Other
![]() FACILITIES
FACILITIES
Layout
Sectors
Indoor
Outdoor
Insert
Racks
Overlapping
Repair
![]() INFORMATION
INFORMATION
NEW: Shoes
Paint your disc
Short wires
Physics
Pants
Training
Charting
Youth
High School
College
Wt. pentathlon
![]() OPINION
OPINION
Chip
Handle
Specs
Doping
Measuring
Outdoor Throwing Facilities
Tony Dziepak, October 1997, last modified 8Aug05
USTC&TBA Track Construction Guidelines
If the throwing pads are to be surrounded by grass, it is recommended that pads be extended for South African drills. Recommended pad dimensions when the pad is surrounded by grass:
Recessed rims are recommended. It is imperative that drainage holes and channels be used on a recessed circle. Both drainage holes and channels should be used in a pad surrounded by grass. On a pad surrounded by artificial surface, only drainage holes should be used, and the artificial surface should slope away from the throwing area by 1/100. Here is the optimal process for drainage holes:
Before pouring the concrete, stick two one-inch-diameter plastic pipes into the gravel. The bottoms of these pipes should be suspended at least 4 inches in the gravel, and there should be an additional two inches of gravel below the pipes. The pipes should be perforated with 1/4-inch holes using a drillbit, along the bottom 4 inches, on the sides of the pipe (10-20 holes). The pipes should be positioned so that they will come up just inside the rim along the sides of the throwing circle; not in the front or back. Before pouting the concrete, put the rim on top of the gravel to check the positioning of the pipes. Adjust as necessary, then remove the rim.
Completely duct tape the top opening of the pipe so that no concrete gets inside. Don't worry about the top height of the pipes when you are pouring the concrete; these will be cut off flush later. Pour the concrete to the level of the inside surface of the circle. Quickly roughly slope this surface at 1/500 toward each side of the circle. This means that the side of the circle, where the drainage holes are, should be 1/8" lower than the middle of the circle. You don't have to finish the corners because more concrete will be added.
Then float the rim on top of this surface within 5-15 minutes of pouring, depending upon conditions. You don't want the concrete to set or the additional concrete won't bind to one solid, uniform piece. Then shovel additional concrete outside the rim and roughly finish. Use a 2x4 to impress the two drainage channels. The channels should separate the front of the circle from the back of the circle. the channels double as the line that indicates if the throwers leaves the back half of the circle. Thus, the channels should be two inches wide (or the width of a 2x4), with the back edge along the actual center of the circle. The front edge will be two inches in front of the actual center of the circle.
The channel adjacent to the rim should be level with the circle (3/4 lower than the rim). The channel can slope downwards toward the outside, surrounding grass (1/50). After the concrete is completely hardened, a two-inch section of the rim, at the channel, will be cut away, so that water can flow from the circle to the channel. Also, the plastic pipe will be cut so that it is flush with the concrete surface.
Surface: The ideal surface on a nonwet day is a completely smooth concrete surface. The only purpose of a brushed surface is to provide drainage in wet conditions. Therefore, the direction of the brushed surface should always be side to side--never concentric.
The circle should be given a very fine light brushed surface. Not a hard bristle broom, but a fine brush that produces 1/64" (1mm) ridges. The ridges should be straight line from side to side, in order to drain the water to the side.
After the circle has hardened for at least a week, you have to rub the surface lightly with a brick to knock down the ridges. The idea is to have valleys, but not ridges. If you knock down the ridges, you have a smooth, level surface. The ideal brick to use for this rubbing is one made with cinder block material.
In general, most high school circles tend to be way too rough, with too coarse ridges. A circle that is too rough can be made a little better by rubbing with a cinder brick, but it still won't be as good as a new circle with less ridges. Also old circles that have a stony surface are more difficult to rub smooth. To avoid this in new construction, work the uncured concrete so that there are no large stones in the top 1/4" surface.
Rubbing down the ridges actually improves the lateral friction because it allows the sole of the shoe to come in contact with a larger, flatter surface. Unpolished ridges can be unpredictable because the sharp points can bite into the soft rubber sole of the shoe, or the points can easily break off, producing slippery sand and dust particles. These particles can act as ball bearings and cause slipping.
Umnpolished ridges can also greatly reduce the life of expensive throwing shoes. Ridges can also inhibit rotational turning of the foot thus leading to injury and poor technique. It is highly desirable to have minimum rotational friction in all the events, while maintaining good lateral friction. Valleys will provide lateral friction in addition to the actual surface. The lateral friction will be directional, perpendicular to the ridges. Thus ridges should be side to side because a thrower wants to have maximum lateral friction in the direction of the throw. Concentric ridges can provide unpredictable directional laeral friction in the center of the circle.
Myth to dispel: some think a shot circle should be rougher than a discus circle, and that a discus circle should be rougher than a hammer circle. Actually, there should be no difference in the finish for any of these events.
1. Improper placement of drainage holes, causing interference with the throw. The drainage holes should be to the side; not in the direction of the throw, and not in the back of the circle.
2. Concentric ridges, causing the circle to drain and dry slower. The ridges should be side to side.
3. Unrubbed surface. Before first use, the surface should be lightly rubbed with a brick or cinder block to knock down the tops of the ridges. After rubbing, the circle must be brushed clean.
4. Improper elevation. The landing area should slope away from the circle by a slope of 1/1000. This means that at the 30' arc, the elevation should be about 3/8" below the surface inside the circle. At 40' and 50' the elevation should be about 1/2" and 5/8" below the surface inside the circle, respectively. The landing sector can slope away from side to side at a slope of 1/100.
5. Landing surface too close to circle, causing sand and cinder to be tracked into the circle. The landing surface material (sand, cinder) should only begin at 20' out into the sector.
6. Improper sloping of circle surface, causing standing puddles and an uneven surface, affecting thrower balance. This is crucial to having a well-drained circle. The circle should be completely level from front to back, and slope only 1/1000 down to each side, where there is a drain on each side. This slope is undetectable. The center of the circle may only be 1/8" higher than the elevation of the drainage holes.
Outdoor circle construction
The ideal circle is surrounded by artificial surface so that grass and mud are not tracked onto the throwing surface. If the throwing pad is to be surrounded by grass, it is recommended that the pad edges be one inch (2.5cm) above the surface of the surrounding grass. This prevents creeping grass and clippings from encroaching onto the circle, aids drainage, and yet is low enough so that mower blades do not strike the edges of the pad. What is really nice is to have the artificial surface come up flush to the edge of the metal throwing rim.
Shot: 8' wide, 11' long, with 3'6" in the back, 6" in the front (the direction of the sector), and 6" on the sides.
Hammer only: 8' x 8', although it is nice to have an additional 8'x12' flat pad (no rims) for drills; however, this may preclude the use of the hammer circle as a weight/superweight competition facility because some throwers may not be able to clear the concrete pad.
Discus: 9'6" wide, 13' long, with the 4' in the back, 9 1/2" in the front, and 7 3/4" on the sides.
 It is imperative that the throwing surface is absolutely level in the direction of the throw from front to back (no detectable slope). The circle should also be absolutely level (no detectable slope) from side to side, for a 2-foot width in the middle of the circle. The circle should be sloped only 1/500 to each side, for drainage, and to prevent any standing puddles. The raised outside pad surface (outside the rim) should be flush with the top surface of the rim, and should slope out from the rim at 1/100. Figure 6 shows an exaggerated cross-section of the slope of the circle from side to side. The black represents the inside circle surface, the blue is the rim side, the red is the raised outside pad, and the green is the drainage channel floor.
 You want to knock down the ridges, but you still want to have valleys (channels) for water drainage. If you polish the circle to the extent that you lose your valleys, your circle will be fast, but it may be slippery in rainy conditions. A circle with valleys will allow any moisture to drain from the top surface. The top surface will dry quicker and stay drier. The shoes only contact the top surface; the shoes never touch the valleys. Figure 7 illustrates a magnified cross-section of the circle surface before and after polishing.
Common mistakes of outdoor facilities construction